이전포스팅에 이어 인증 절차를 추가해봅시다. 👍
이번 포스팅(인증)에서는 도메인을 가지고있어야 진행할 수 있습니다.
[IAM 관리 오픈소스] Consoleme 무작정 따라하기 #1
안녕하세요 ✨ 이번에는 Consoleme 무작정 따라하기 입니다!! ConsoleMe: A Central Control Plane for AWS Permissions and Access By Curtis Castrapel Patrick Sanders netflixtechblog.com 오픈소스다 보니 시..
1mini2.tistory.com
Step #2) Cognito 생성하기
Consoleme에서 제공하는 인증 방식은 여러가지가 있습니다. (참고)
2022.2월 지금 기준으로 인증안함(로컬개발), Google 그룹, OIDC/OAuth2, SAML, 텍스트 헤더 방식이 있겠네요.
저는 이중에서 ALB+Cognito(OIDC)방식으로 진행하도록 하겠습니다.분명, 콘솔미 페이지에 설정 방법이 안내 되어있는데 찾기가 쉽지 않아서 .... 이 부분때문에 포스팅을 하게 되었다능..😥
먼저, Cognito 접속해서 사용자 풀을 만들어줍시다. (Cognito 콘솔이 새로 나왔습니다. 저는 새로운 콘솔로 볼게요!)

사용자 풀 생성을 클릭합니다.
1단계, 로그인 환경 구성 단계입니다. 이메일을 클릭하고 다음으로 넘어갑니다.(나중에 바꿀 수 없습니다!)
2단계, 보안요구사항구성 입니다. MFA 없음으로 하고 다음으로 넘어갑시다.
3단계, 가입환경 구성입니다.
사용자 스스로가 계정을 생성해서 들어올 수 없도록 하고 다음으로 넘어갑니다.
4단계, 메시지 전송 구성입니다.
이 부분에서 이메일 주소가 나오지 않는다면 버지니아 리전 SES에서 이메일 인증을 받으세요!! 이후 다음을 클릭합니다.
5단계, 앱통합 입니다. 여기서는 빨간색으로 표시된 부분 잘 보고 그대로 해주세요!
** 주의: 내가 사용할 수 있는 도메인 주소가 있어야 합니다.
6단계, 검토 및 생성입니다. 전체적으로 잘 못들어간 부분은 없는지 확인 후 사용자풀을 생성합니다.
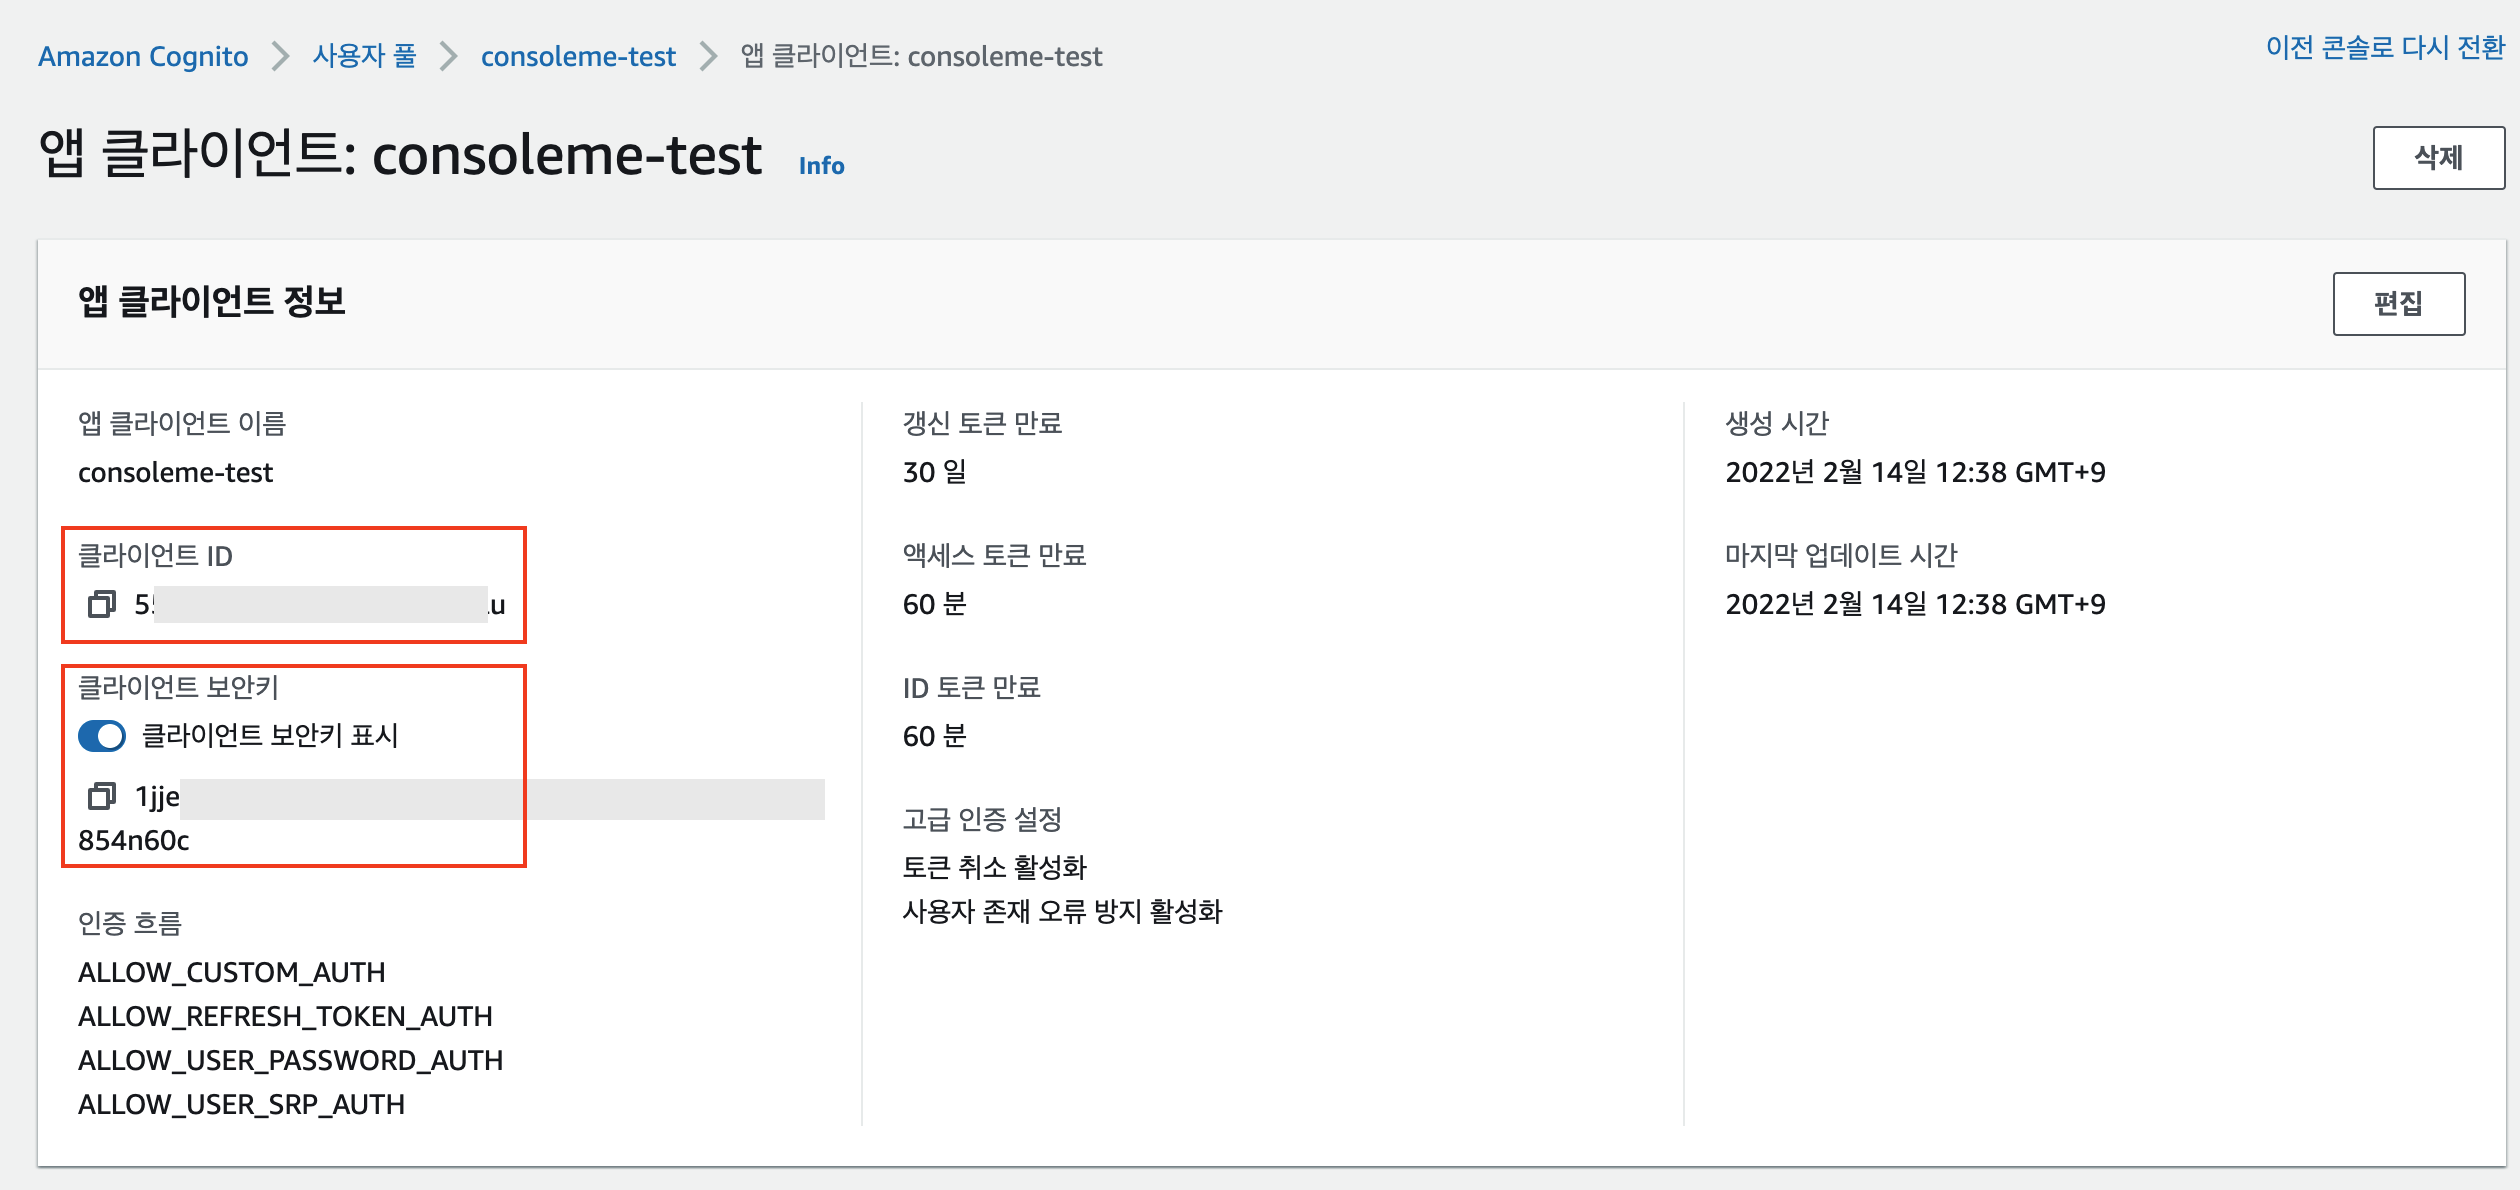
이제 중요한것이 남았습니다! 앱클라이언트의 ID/보안키를 확인해야합니다.
위치는 사용자풀의 하위탭 "앱통합"을 선택하여 맨 아래로 쭉 내리면 있습니다.
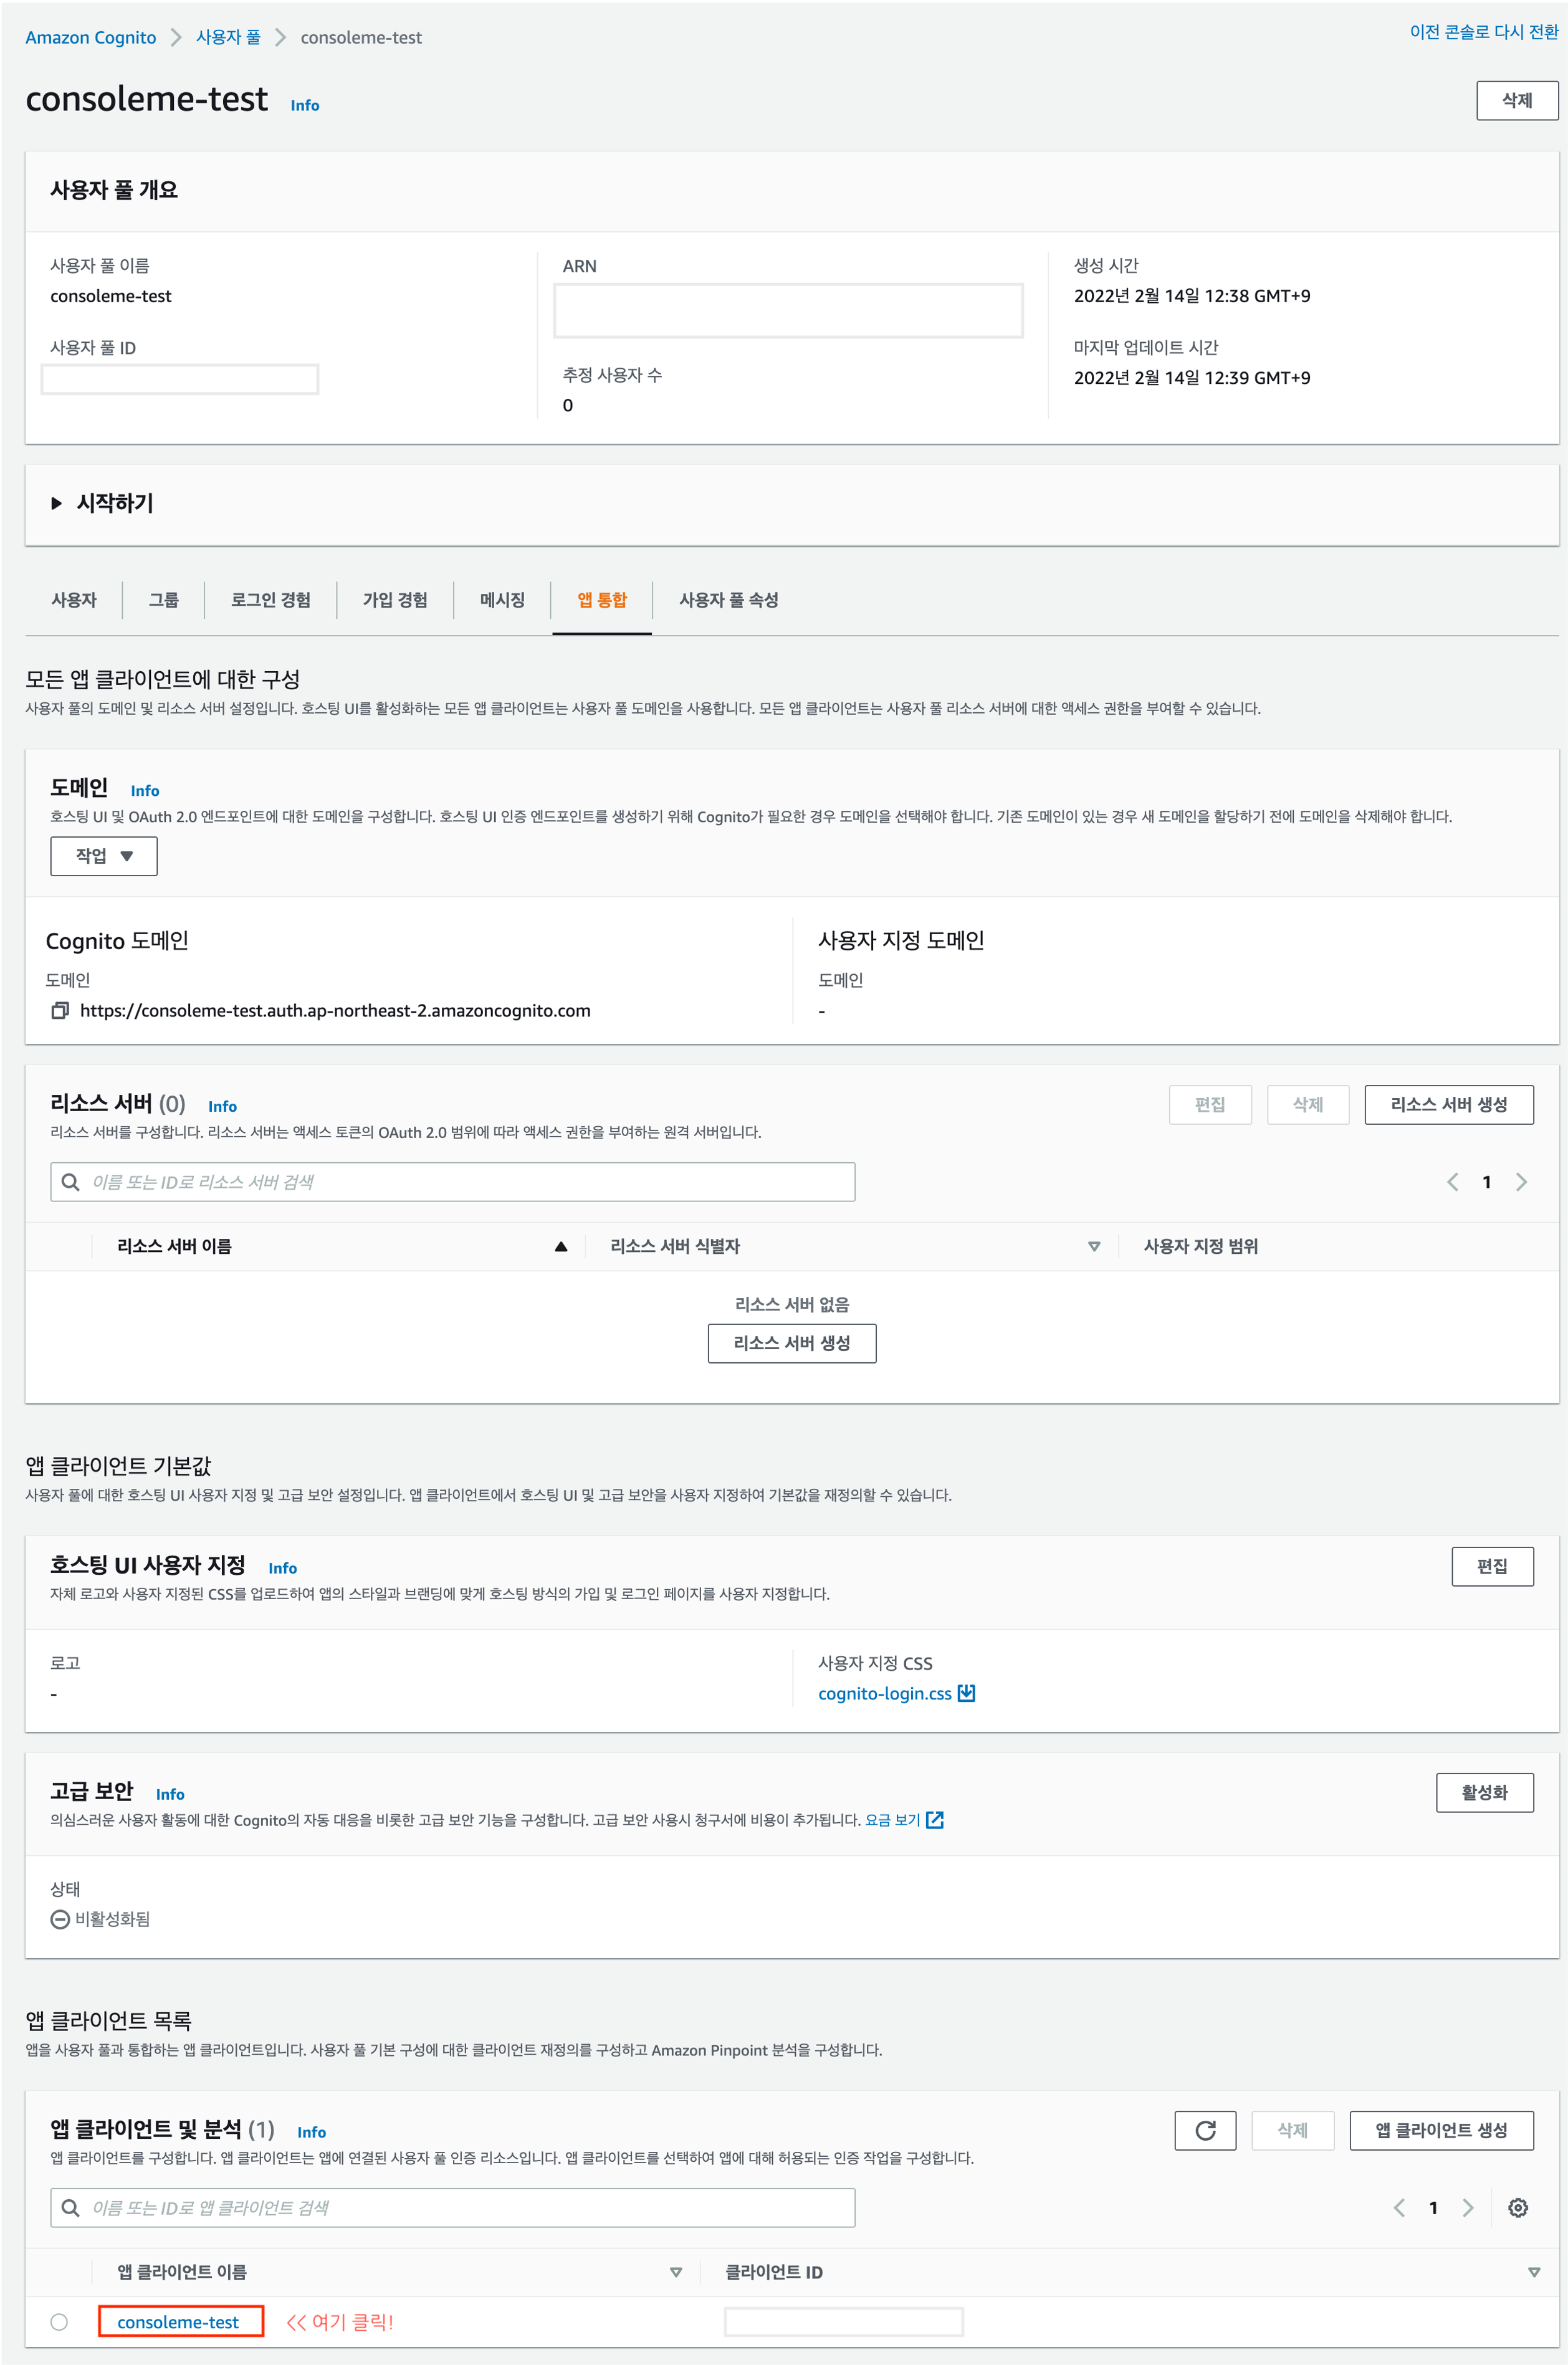
그리고 이 앱 클라이언트 ID/보안키를 적어둡시다.
이 뒤에 설정파일에 들어가요!! 😉
Step #3) ALB 설정하기
이제 여기를 클릭하여 EC2콘솔로 이동하고 ALB를 생성해줍니다.
ALB를 생성하는것은 아래를 참고해주세요!
[ALB] SSL 및 서브도메인 리디렉션
이번 포스팅에서는 SSL 인증서를 사용하고, 서브 도메인을 리디렉션 시키도록 구성하도록 하겠습니다. ALB에 대한 자세한 설명은 생락하겠습니다. ALB에 대한 지식은 공식문서를 참조해주세요. 목
1mini2.tistory.com
이제 ALB의 리스너 목록이 80, 443 두개가 있죠! 여기서 443리스너를 수정합니다.
Cognito목록이 드롭다운 될건데, 위에서 생성한거 선택해줍시다!
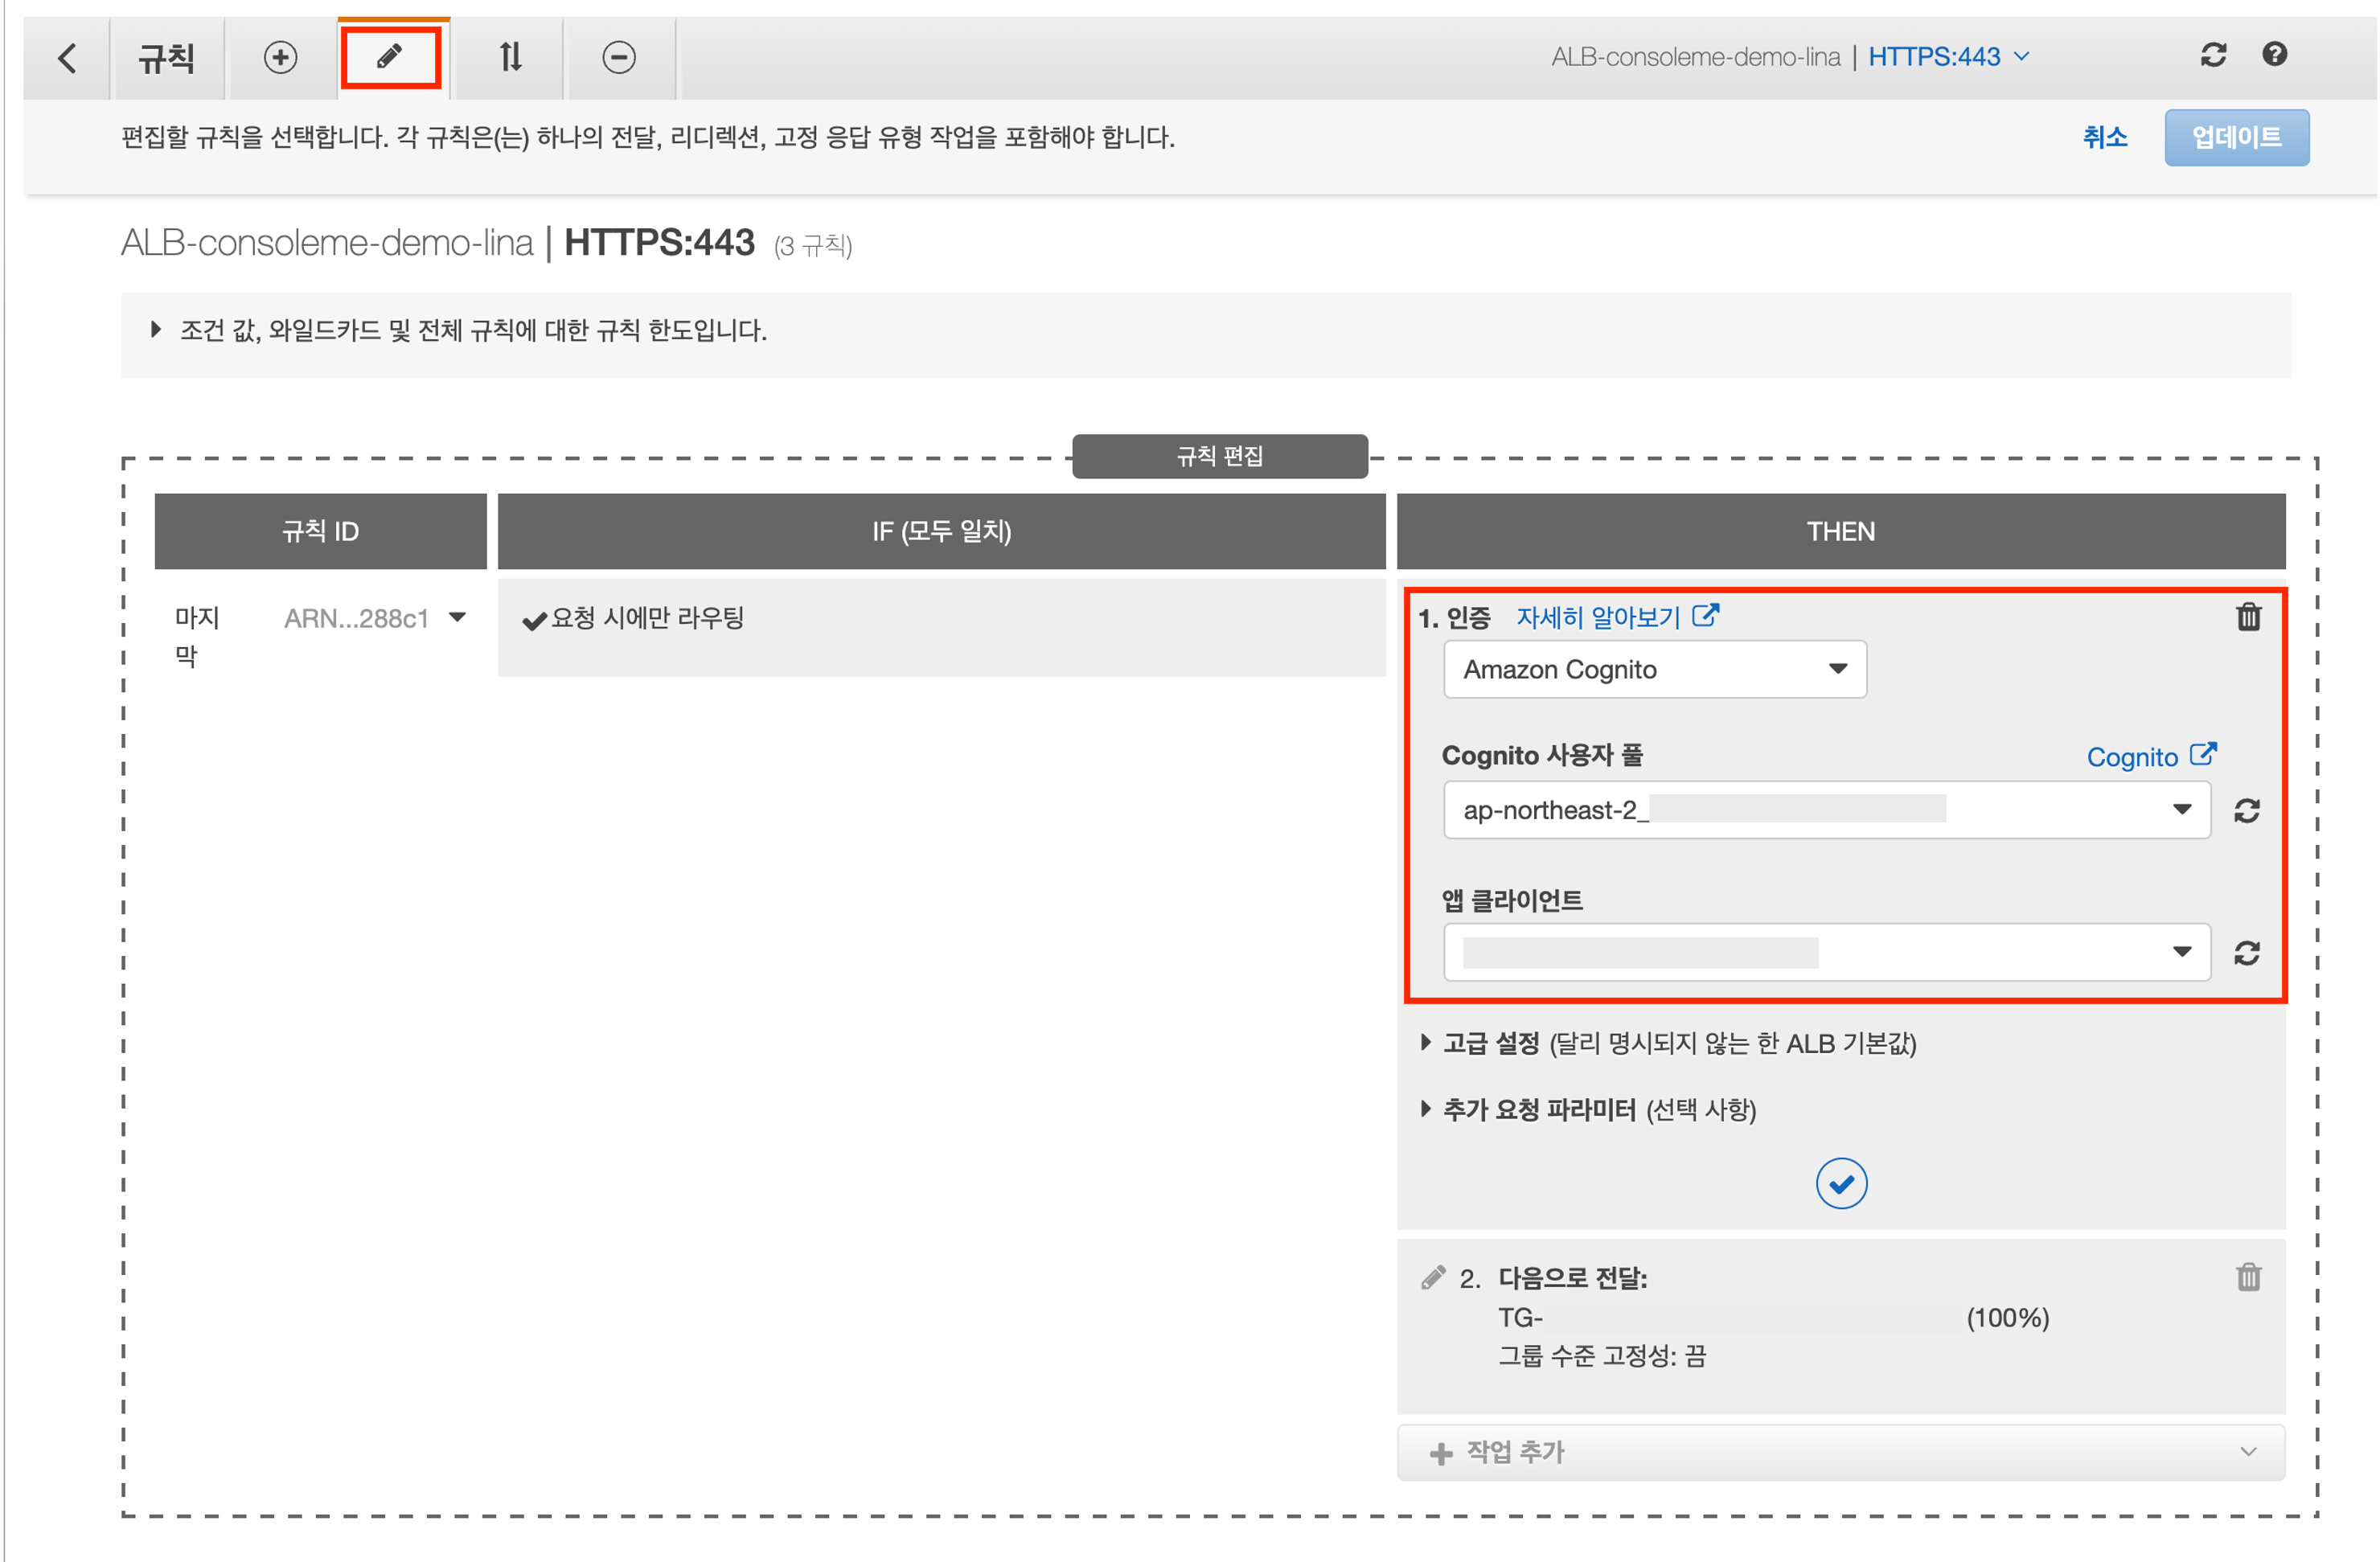
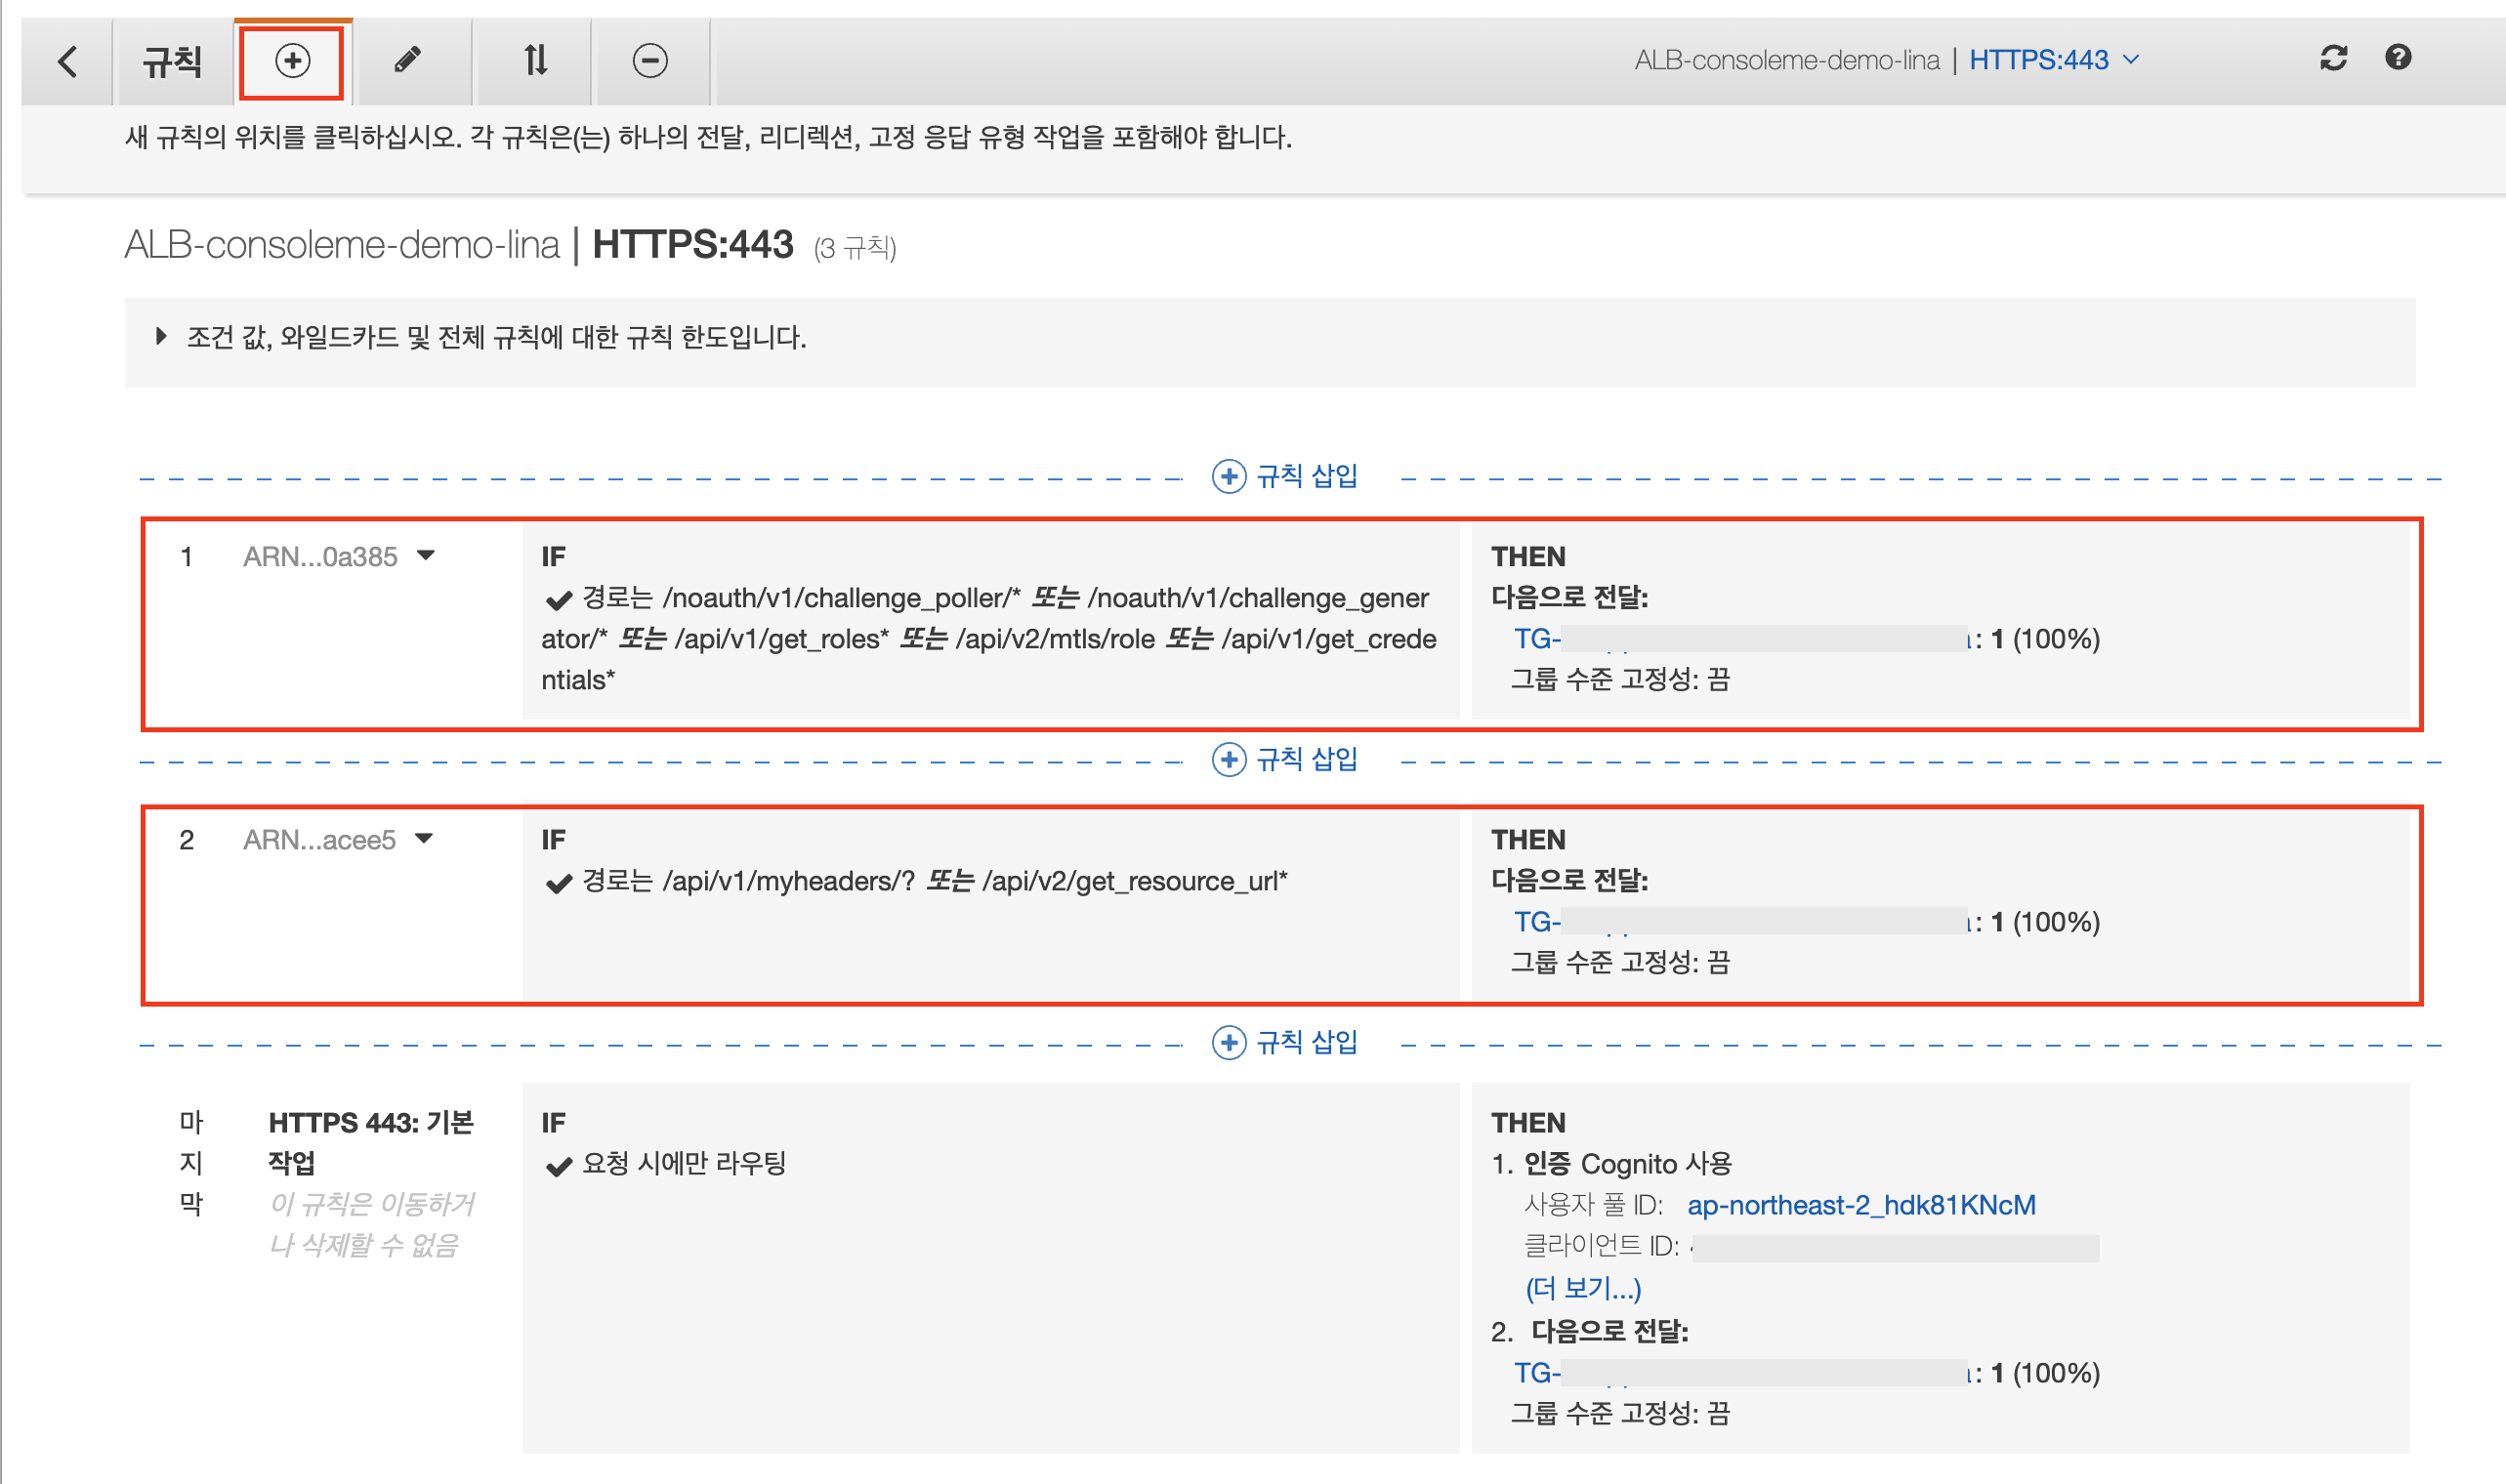
여기까지 설정하시고 저장하고, 규칙을 2개 더 생성해줄겁니다. (공식문서)
사용자 인증을 정상적으로 하기 위해서는 인증 URL은 우회하도록 설정해야겠죠! 아래 5개 경로에 대해서는 바로 타켓그룹에 전달해줍니다.
-
/noauth/v1/challenge_poller/*
-
/noauth/v1/challenge_generator/*
-
/api/v1/get_roles*
-
/api/v2/mtls/roles/*
-
/api/v1/get_credentials*
-
/api/v1/myheaders/?
-
/api/v2/get_resource_url*
여기까지 완료 되었다면 이제 AWS콘솔에서 작업할 내용은 끝났습니다!
이제 EC2로 돌아가서 설정파일을 바꿔줍시다~~!
Step #4) 설정파일 바꾸고 시작하기
Consoleme는 YAML파일을 구성해야 합니다. 정상적으로 동작하려면요! (저도아직 다 파악못했습니다.알려주실분..? 😞)
구성파일 로드 순서는 아래와 같습니다.
-
환경변수: CONFIG_LOCATION
-
작업디렉토리의 consoleme.yaml
-
~/.config/consoleme/config.yaml
-
/etc/consoleme/config/config.yaml
-
작업디렉토리의 example_config/example_config_development.yaml >>기본파일
저는 이제 /etc/consoleme/config 디렉토리에 아래 3개의 파일을 설정할겁니다.
1) /etc/consoleme/config/config.yaml
# vim /etc/consoleme/config/config.yaml 명령어로 파일을 열어 아래 내용을 복붙하세요!
extends:
  - consoleme_config_header_auth.yaml

environment: dev
development: true

tornado:
  xsrf: false # So you can test POST requests with Postman

_development_user_override: admin@example.com
_development_groups_override:
  - groupa@example.com
  - groupb@example.com
  - configeditors@example.com
  - consoleme_admins@example.com
  - consoleme_admins # Groups do not need to be an email address

dynamodb_server: http://localhost:8005
redis:
  host:
    global: localhost
celery:
  broker:
    global: redis://localhost:6379/2
  active_region: ap-northeast-2

export_to_terraform_enabled: true

challenge_url:
  request_ip_must_match_challenge_creation_ip: false

logging:
  stdout_enabled: true
  format: "%(asctime)s - %(levelname)s - %(name)s - [%(filename)s:%(lineno)s - %(funcName)s() ] - %(message)s"
  level: debug
  file: /consoleme/logs/consoleme_tornado.log
2) /etc/consoleme/config/consoleme_config_header_auth.yaml
# vim /etc/consoleme/config/consoleme_config_header_auth.yaml 명령어로 파일을 열어 아래 내용을 복붙하세요!
<>부분을 확인하여 잘 수정해주세요!!
extends:
  - consoleme_config_base.yaml

auth:
  get_user_by_aws_alb_auth: true
  set_auth_cookie: true
  # [수정부분-logout_redirect_url]
  logout_redirect_url: "https://<Cognito 도메인을 입력하세요>.auth.ap-northeast-2.amazoncognito.com/logout?response_type=code&client_id=<여기에 코그니토 앱클라이언트 ID 넣으세요!>&logout_uri=https://<여기에 내 도메인을 입력하세요>"
  extra_auth_cookies:
    - AWSELBAuthSessionCookie-0
  remote_ip:
    trusted_remote_ip_header: X-Forwarded-For
get_user_by_oidc_settings:
  # [수정부분-metadata_url] 코그니토 사용자 풀 ID는 코그니토 메인페이지에서 확인할 수있습니다.
  metadata_url: https://cognito-idp.ap-northeast-2.amazonaws.com/<여기에 코그니토 사용자 풀 ID넣으세요!>/.well-known/openid-configuration
  jwt_verify: true
  jwt_email_key: email
  jwt_groups_key: cognito:groups
  grant_type: authorization_code
  id_token_response_key: id_token
  access_token_response_key: access_token
  access_token_audience: null

oidc_secrets:
  #[수정부분-client_id/secret] 코그니토 앱클라이언트 ID/보안키는 코그니토생성 단계에서 복사해놨었죠?!
  client_id: <여기에 코그니토 앱클라이언트 ID 넣으세요!>
  secret: <여기에 코그니토 앱클라이언트 보안키 넣으세요!>
  client_scope:
    - openid
    - email

development: true

url: http://localhost:8081
3) /etc/consoleme/config/consoleme_config_base.yaml
# vim /etc/consoleme/config/consoleme_config_base.yaml 명령어로 파일을 열어 아래 내용을 복붙하세요!
application_admin: admin@example.com

# These are the tornado settings. Set `debug` to false in production.
tornado:
  debug: true
  port: 8081
  xsrf: true
  xsrf_cookie_kwargs:
    samesite: strict

account_ids_to_name:
  # [수정부분] 실제 AWSAccountID를 입력하세요
  "123456789012": prod_account
  "123456789013": dev_account
#  "123456789014": test

cloud_credential_authorization_mapping:
  role_tags:
    enabled: true
    authorized_groups_tags:
      - consoleme-authorized
    authorized_groups_cli_only_tags:
      - consoleme-owner-dl
      - consoleme-authorized-cli-only
aws:
  issuer: example
  region: "ap-northeast-2"

celery:
  active_region: ap-northeast-2

cli_auth:
  certificate_header: certificate_header
  required_headers:
    - RequiredMTLSHeader: RequiredMTLSHeaderValue

groups:
  can_edit_config:
    - admin@example.com
  can_admin_policies:
    - admin@example.com
#  developement_notification_emails:
#    - developer@example.com
#  can_edit_config:
#    - configeditors@example.com
#  can_edit_policies:
#    - policyeditors@example.com

jwt:
  email_key: email

support_contact: admin@example.com
support_chat_url: https://myslack.slack.com/archives/123123123
documentation_page: https://github.com/Netflix/consoleme/

logging_levels:
  asyncio: WARNING
  boto3: CRITICAL
  boto: CRITICAL
  botocore: CRITICAL
  elasticsearch.trace: ERROR
  elasticsearch: ERROR
  nose: CRITICAL
  parso.python.diff: WARNING
  s3transfer: CRITICAL
  spectator.HttpClient: WARNING
  spectator.Registry: WARNING
  urllib3: ERROR


ses:
  support_reference: "Please contact us at consoleme@example.com if you have any questions or concerns."
  # [수정부분-arn] SES에서 인증받은 도메인or이메일의 ARN을 쓰세요.
  arn: "arn:aws:ses:ap-northeast-2:123456789012:identity/admin@example.com"
  region: "ap-northeast-2"
  consoleme:
    name: consoleme
    # [수정부분-sender] SES에서 사용가능한 이메일을 쓰세요.
    sender: admin@example.com

challenge_url:
  enabled: true

example_config:
  is_example_config: true
  title: "Warning:"
  text: |-
    This configuration has no authentication configured. Do not use in a production environment. Do not publicly expose this endpoint or your AWS environment will be compromised! Click [here](/generate_config) to generate a configuration.
  routes: .*
모든 설정이 완료 되었다면 3개의 파일이 다 있는지 점검해봅시다.
(env) root@ec2:/etc/consoleme/config# ls -al
total 28
drwxr-xr-x 2 root root 4096 Feb 14 04:32 .
drwxr-xr-x 3 root root 4096 Feb 12 07:23 ..
-rw-r--r-- 1 root root 1665 Feb 12 16:16 config.yaml
-rw-r--r-- 1 root root 8846 Feb 14 00:54 consoleme_config_base.yaml
-rw-r--r-- 1 root root 1195 Feb 12 15:24 consoleme_config_header_auth.yaml
이제 실행해볼까요?
(env) root@ec2:/consoleme# python /consoleme/consoleme/__main__.py
서비스등록을 하셨다면😉 systemctl restart consoleme
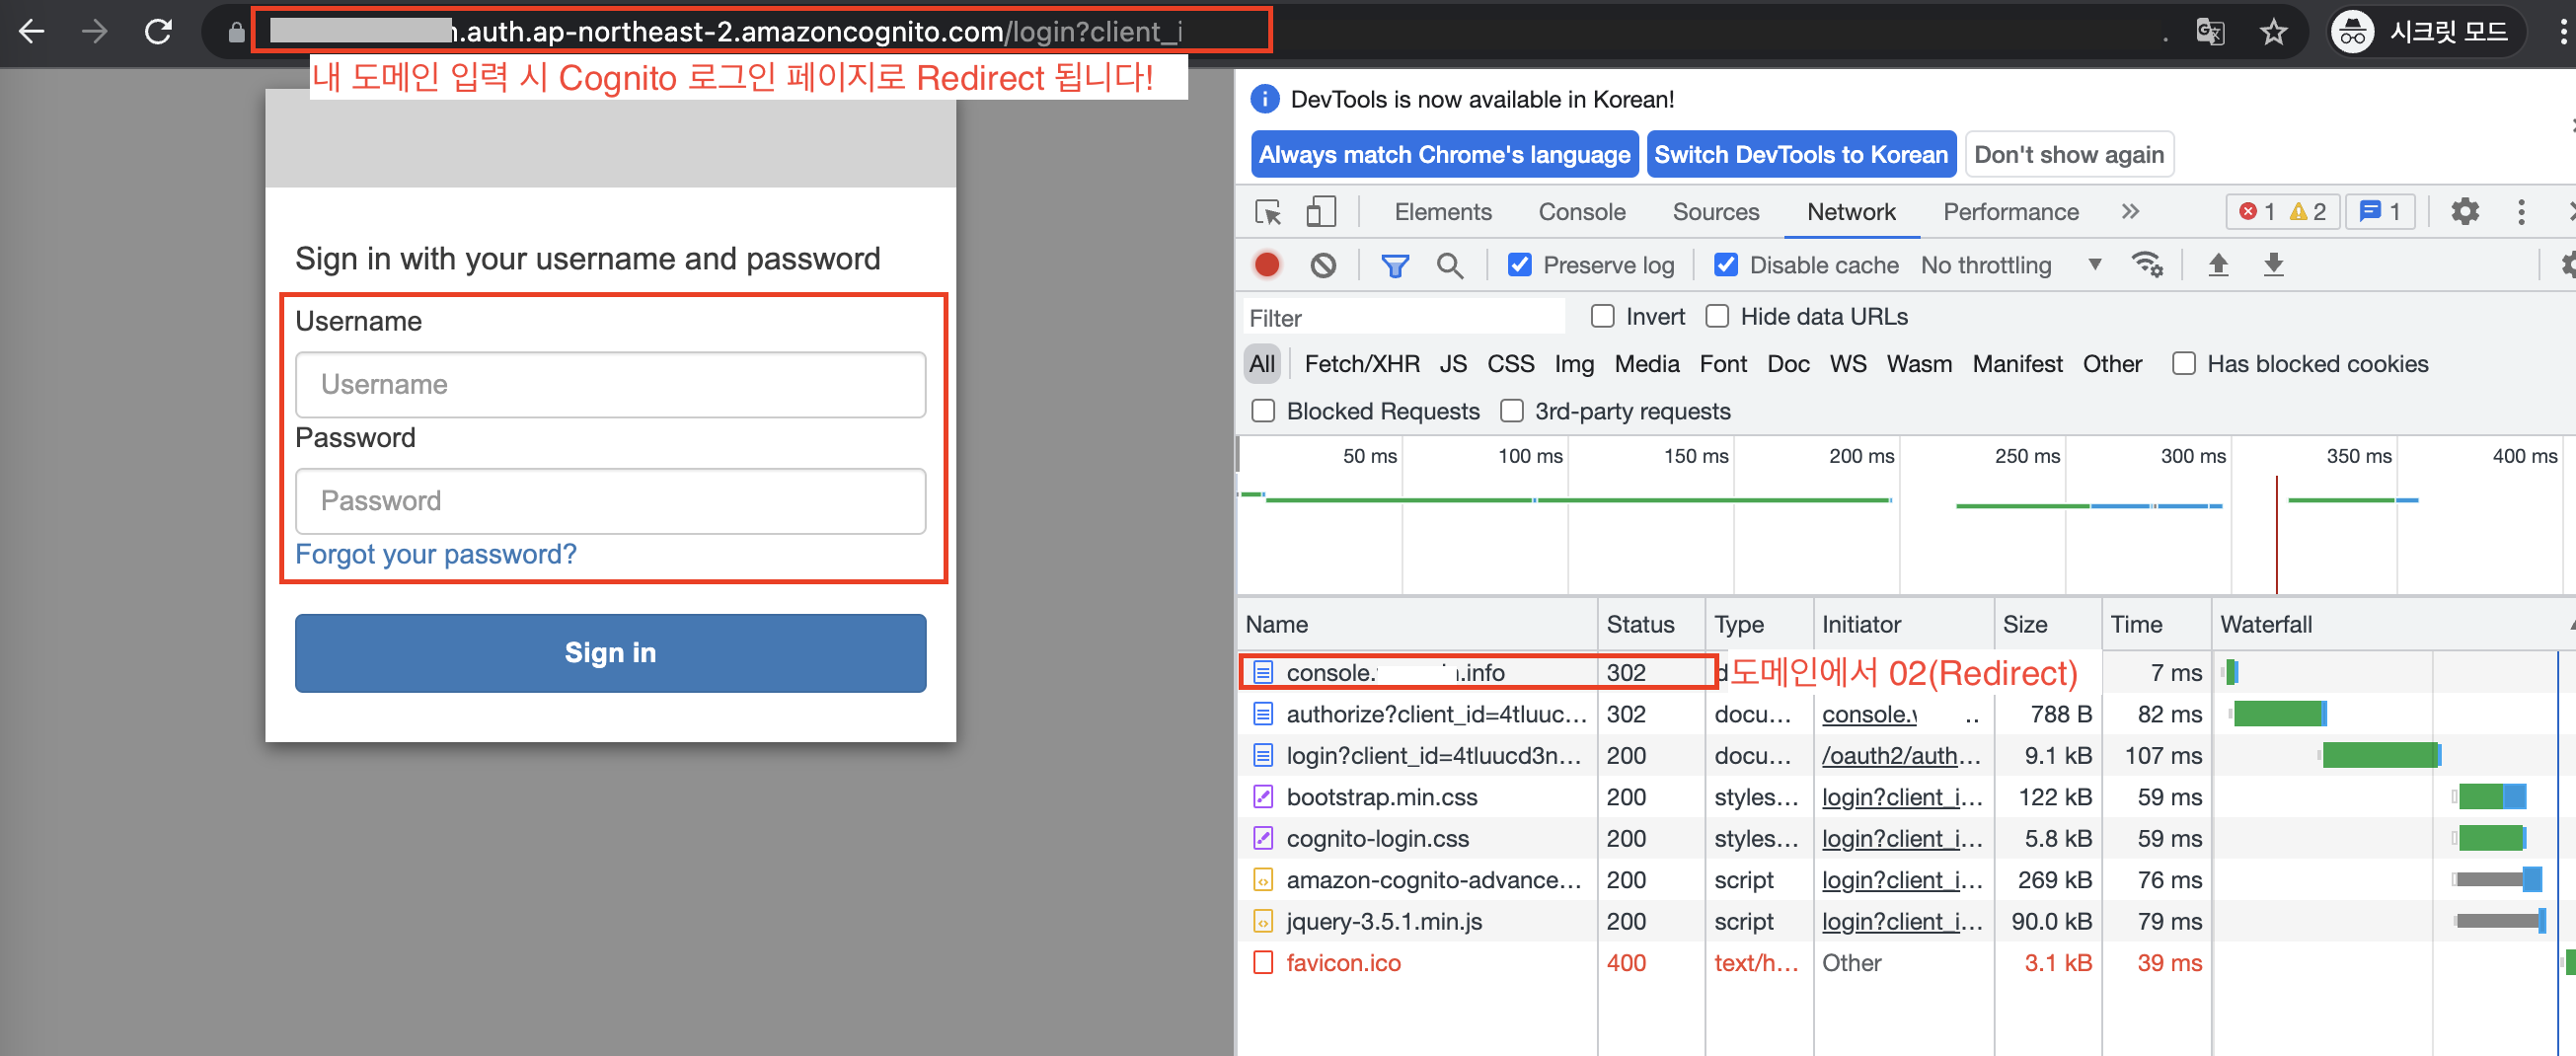
이제 브라우저를 켜고 접속해봅시다.
바로 Cognito 인증 경로로 넘어갔죠? 코그니토에서 사용자를 생성하고, 그 사용자로 로그인해봅시다.
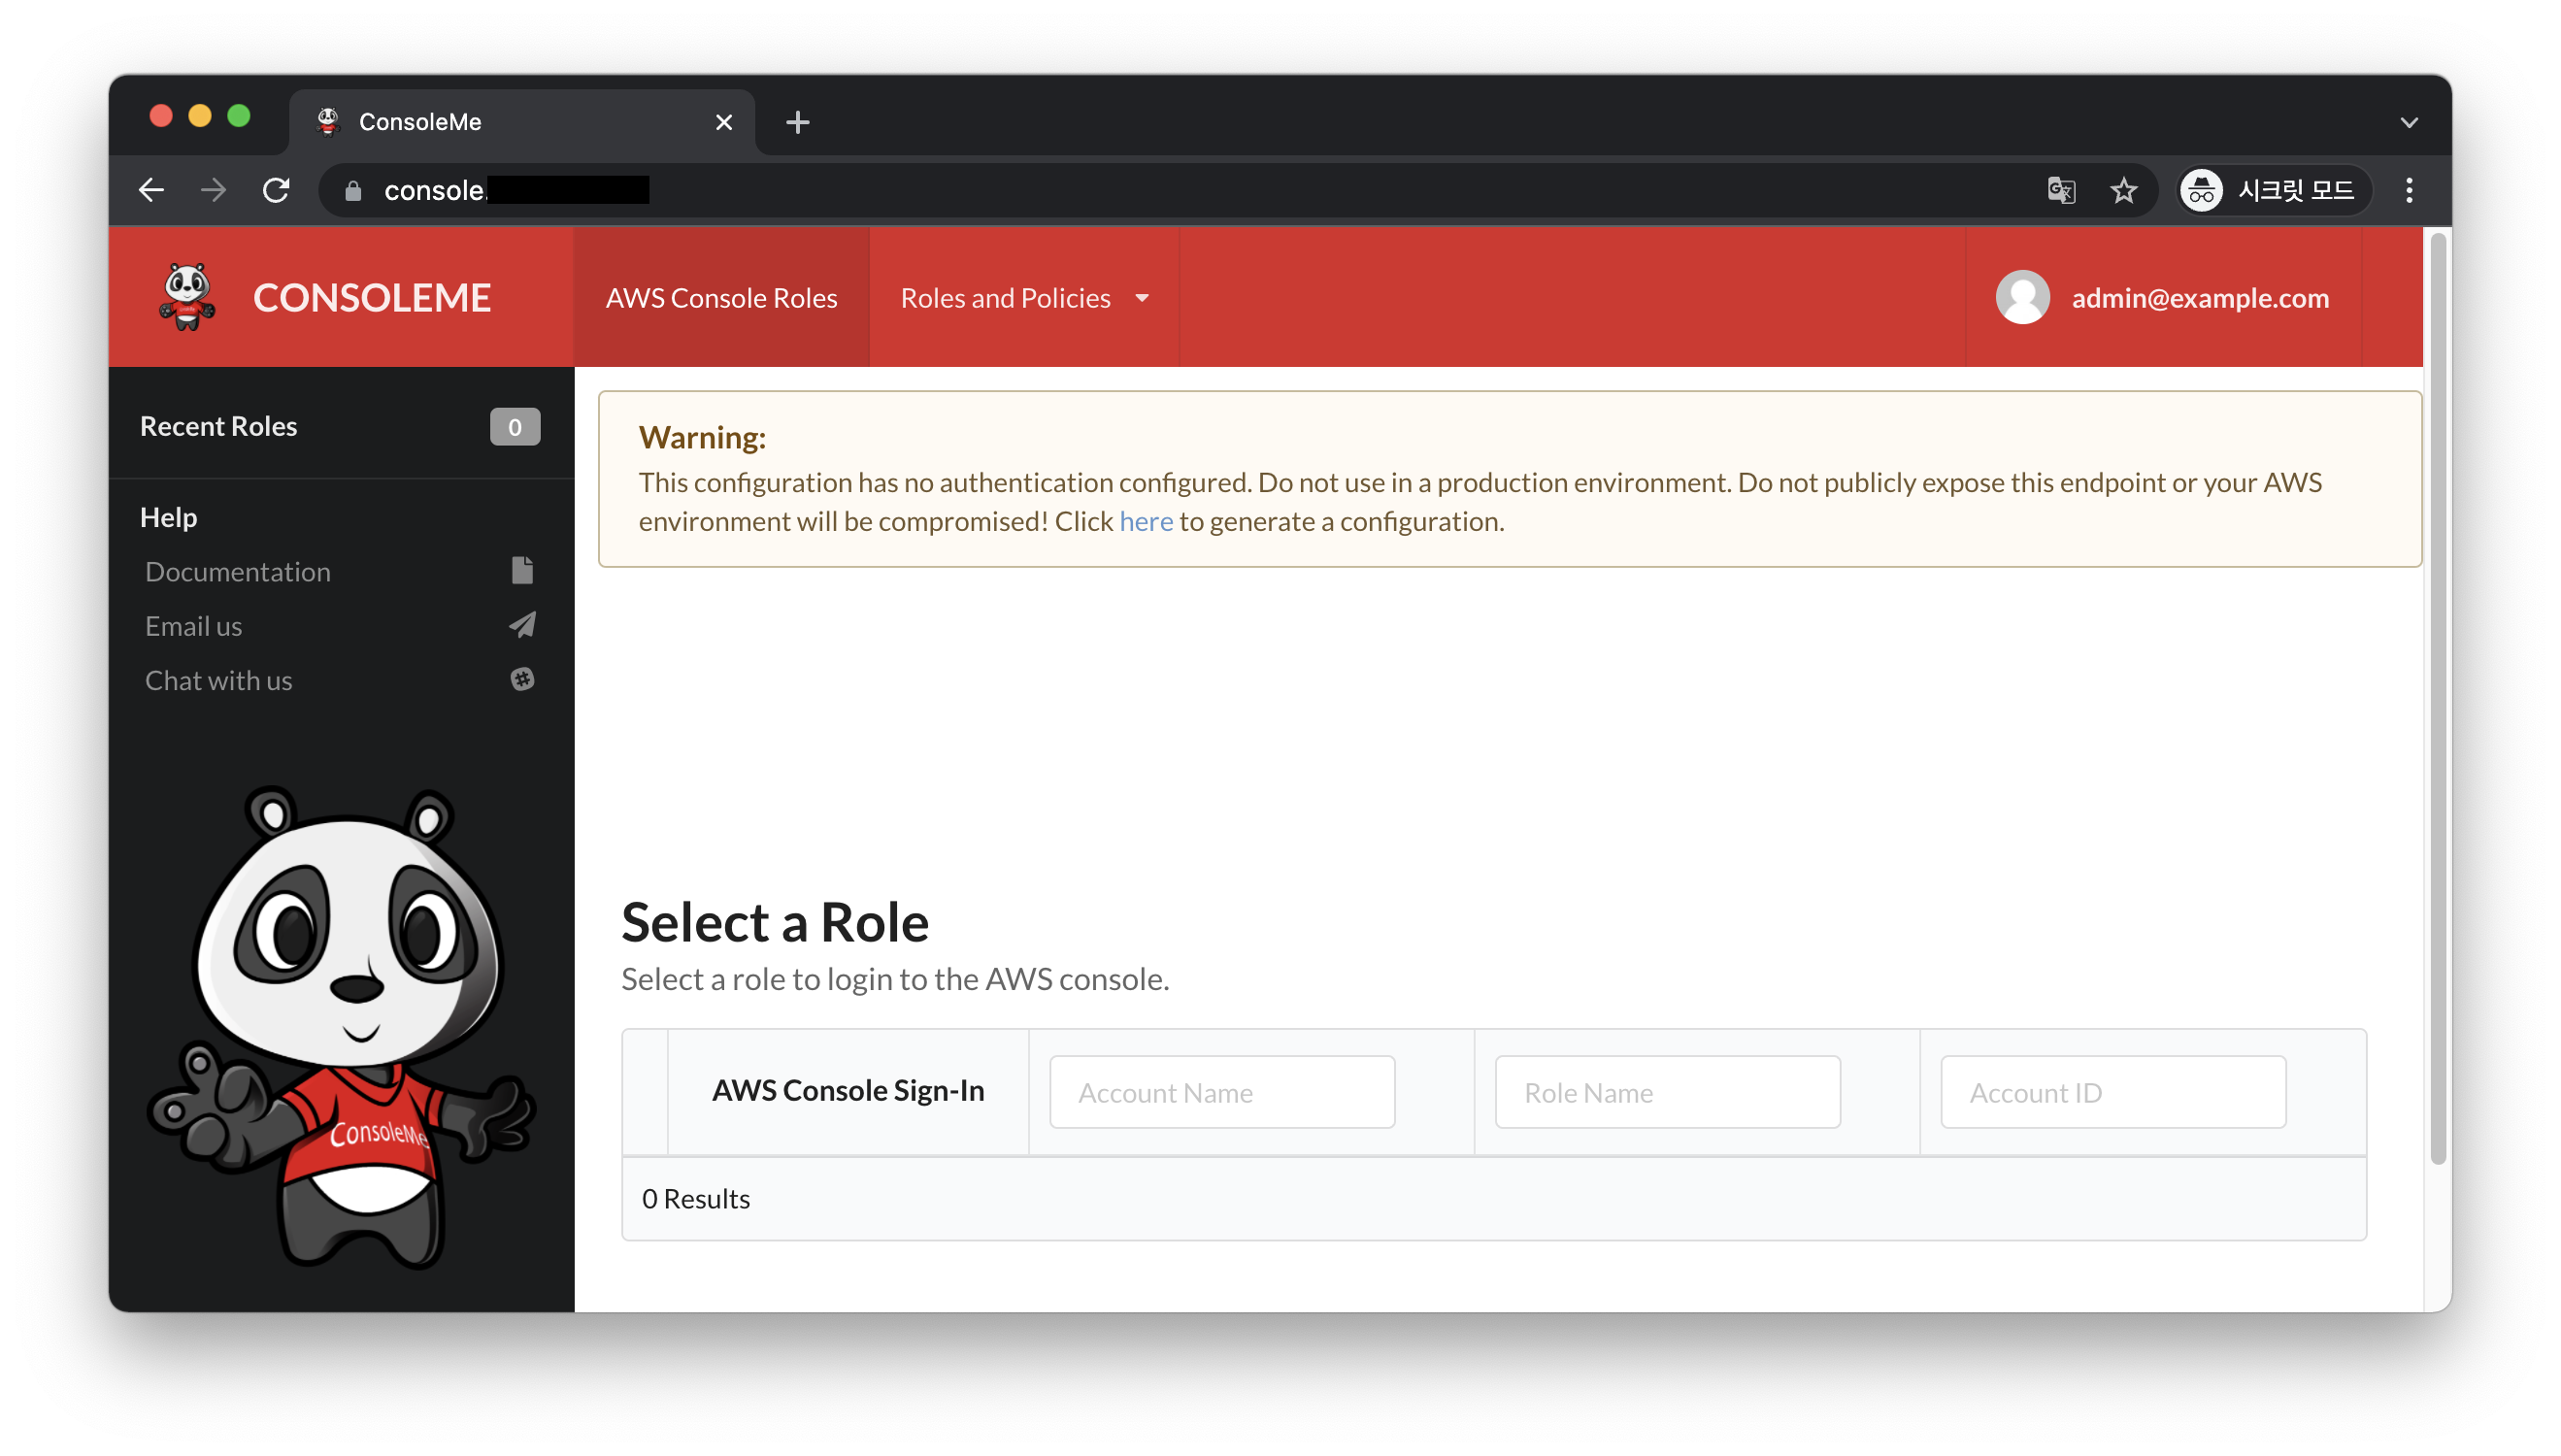
로그인 잘 되었나요? ㅎㅎ
로그아웃도 한번 해보세요!
일단, 여기까지 ALB+Congito 인증 부분이었습니다.
다음에 User/Group Mapping 으로 다시 뵙겠습니다! 뿅🤓☄️